How to fix “USB not detected” issue? 

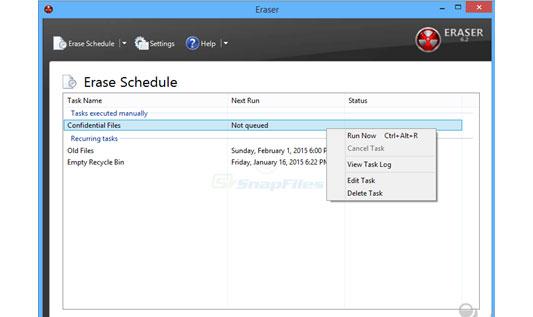
It may have happened to you that the moment you connect the USB, the computer fails to recognize it and displays an error message “USB Device Not Recognized”. This is a typical USB issue which drives the user to frustration.

USB Device Not Recognized error message

Picture this, it’s your marriage anniversary and you wish to relive those joyous moments all over again. You want to cherish your marriage memories which will live for many years to come. To celebrate your anniversary, you decide to treasure the wonderful moments shared with your partner and consider celebrating your marriage for a second, third, or infinite number of times.

For that, you connect your USB drive which has the video file of your marriage ceremony. While watching your marriage ceremony, the computer shuts down unexpectedly. After a few minutes, when you restart the system and reconnect the USB, you run into an error i.e. your USB is not detected by the computer. As luck would have it, the system is unable to read the USB, and consequently, it ruins your happy moments. Can it be any more annoying than this?

You can relive the moments as there are several methods which can fix “USB not detected” issue. That said, let’s get into the methods to resolve the USB detection error.

Methods to fix “USB not detected” error

Method #1: Restart your system

Safely remove the USB and shutdown the system. Unplug the cable from the power outlet and wait for a few minutes. This will reset the USB hub and all the microprocessors. Restart your system again. In the case of a laptop, you can remove the battery and then restart it.

Method #2: Disconnect your USB 

Another method is to disconnect the USB device, restart the system, and then connect the USB. If the particular USB port is unable to recognize it, then you can connect it to the different ports. Sometimes there are hardware issues which results in USB not detected error.

Method #3: Update Device Drive

Are you using the latest drive? Have you installed the necessary updates? There might be a possibility that you’re running an outdated device which is causing the USB detection error. You need to update the drive. Here’s how:

  1. Go to Control Panel and select Device Manager
  2. Locate the unknown device. Right click on it, select Properties < Driver

    Device Manager


  3. Finally, select Update Driver tab

    Update Driver

Method #4: Windows USB Troubleshooter

You can use Windows troubleshooter utility and fix the issue. If you’re not that good with the command line or doesn’t want to get into the technical aspects, then this method will suffice. All you have to do is just click on the “USB not detected” error and choose from the two given options as shown in the figure below:

Windows troubleshooting process

Method #5: Uninstall USB

Another method is to safely uninstall the USB and connect it without having to restart the system. To uninstall the USB device, follow these steps:

  1. Go to Control Panel < Device Manager
  2. Navigate the USB (unknown device), right click on it and select Uninstall
  3. After uninstalling the USB device, restart your system

    Uninstall the USB

Method #6: Other Feasible Options

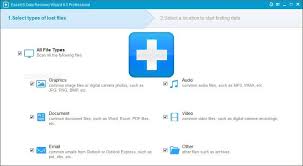
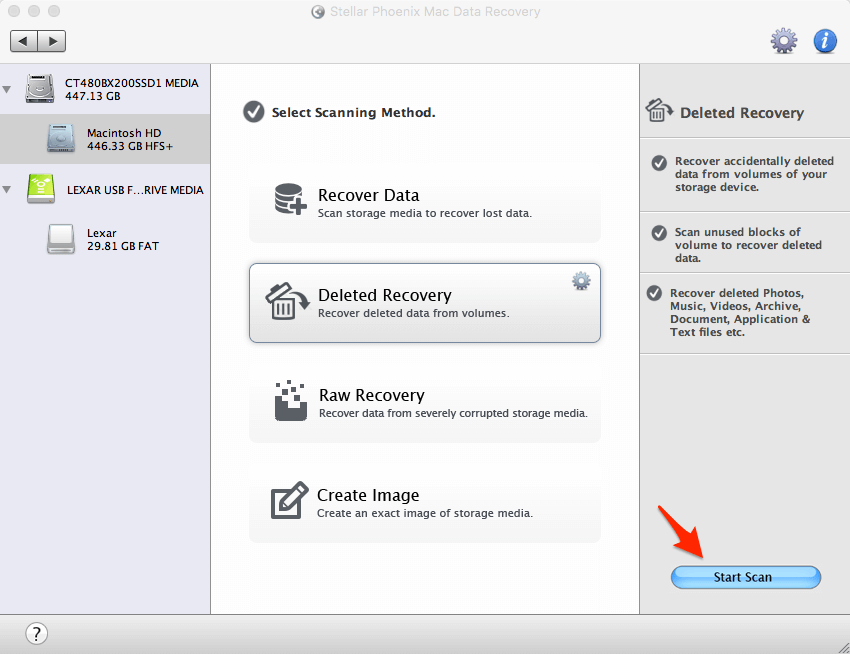
If you’re still unable to fix the “USB not detected” issue, then your step would be to recover the data from the USB. Chances are that the problem could be due to hardware failure. It could be that the computer crashed or the USB turned inaccessible. Either way, you may lose your data. In the worst case scenario, if you lose your data, then a data recovery software will bring it back. That being said, Stellar Phoenix Windows Data Recovery – Professional is a viable option to retrieve your lost data. With 3 easy steps – Scan, Preview & Recover, restore your marriage video with ease!

Stellar Phoenix Windows Data Recovery

Sometimes your USB controller turns unstable or corrupt; therefore, try connecting it to the system via a cable. Furthermore, make it a point to install the latest important hardware updates to prevent any similar issues and have the backup of your marriage video so that you can retrieve it under severe data loss situations. 

The Bottom Line 

USB related issues should not impede your joyous moments. Now you know several methods to counter the “USB not detected” error. This is the ultimate guide to resolve the issue and if you have another hack, feel free to add it in the comments section. 

Guest post. Author Bio:
Data recovery expert at Stellar Data Recovery, recovering data since 1993. Playing around with hard drives, Windows OS issues and suggesting fixes is among the major activities I love. Share my knowledge and expertise over different media channels from time to time or as soon as find a new one. 

How to permanently delete files from your storage (Mac Tutorial)

Last week I tested a data recovery tool called EaseUS Data Recovery Wizard. I was surprised to see that all my files are not deleted even if I empty Trash and format the drive. All data was still there and that tool made an extremely good job recovering my files.

Therefore I just go searching for explanations. There was a simple solution. The modern digital storage devices use multiple levels of data protection in order to prevent accidental data loss. Data is protected both hardware and software and modern devices are quite reliable now. For example, removing your USB memory during reading or writing data will most probable keep your data save even if this action is strongly not recommended (you should always remove your drive safely). Software protection works quite simple, it just not delete files, only overwrites them. If you delete a file and empty the Trash, that file will just be set as “free” and nothing else. The memory used by that file is not changed until another file will be written.

If you need to sell any storage device (usb drive, hard disk, ssd, your mac, pc, phone, SD card and so on) you need to be aware that the buyer might be able to restore some of your personal data. Your iPhone and Mac store your data encrypted by default and you should be safe, but other drives you might use are usually not protected. For example, I used a USB hard disk (500GB) to store my files. A couple of days ago I got another external drive and I moved all my data from it. Empty my trash and was curious of what I can recover from it… and surprise surprise, all my data was there.

If you want to permanently delete your data from a drive you need to:

1. Open Disk Utility

 3. Select your drive and click Erase

4. Go to Security Options… for extra settings. You can choose between faster or more secure and 2 steps between:

Fastest: This option does not securely erase the files on the disk. A disk recovery application may be able to recover the files.

Fast: This option writes a pass of random data and then a single pass of zeros over the entire disk. It erases the information used to access your files and writes over the data 2 times.

Secure: This option is a DOE-compliant 3-pass secure erase. It writes two passes of random data followed by a single pass of known data over the entire disk. It erases the information used to access your files and writes over the data 3 times.

Most secure: This option meets the US Department of Defense (DoD) 5220-22 M standard for securely erasing magnetic media. It erases the information used to access your files and writes over the data 7 times.

5. I chose most secure option and clicked OK.

almost one day later:

The log:

Starting secure erase…
Pass: 1
Pass: 2
Pass: 3
Pass: 4
Pass: 5
Pass: 6
Pass: 7
Unmounting disk
Erasing
Volume name : Data
Partition offset : 411648 sectors (210763776 bytes)
Volume size : 976361472 sectors (499897073664 bytes)
Bytes per sector : 512
Bytes per cluster: 131072
FAT offset : 2048 sectors (1048576 bytes)
# FAT sectors : 30720
Number of FATs : 1
Cluster offset : 32768 sectors (16777216 bytes)
# Clusters : 3813784
Volume Serial # : 59a6aade
Bitmap start : 2
Bitmap file size : 476723
Upcase start : 6
Upcase file size : 5836
Root start : 7

Mounting disk
Operation successful.

The drive was unmounted and mounted again. And this should be all. I checked again with EaseUS Data Recovery Wizard and it was not able to recover any of my files (deep scan included):

WordPress on Shared hosting: “406 Not Acceptable error” fix

Last days I ran into some strange behaviour of this blog. I tried to post a new article and save a Draft. It worked good until I uploaded an image. Saving the draft or saving the post was redirecting me to a non-existing page (404 page error) without saving any changes to my article. I was able to recover some data from the browser backup but again saving was not possible and the information lost. Then I close the browser and any backup was lost for good and that was very … very frustrating.

Therefore I searched for solutions… first thing I found on the internet was linked to my permalink structure. Suggestions are to go to Dashboard and then Settings -> Permalink and save again your permalink settings … and again …. 404 error page. Then I chose the default permalink called “Plain” and I was able to save that change. What was even more frustrated was that I was no longer able to come back to my custom settings. I was getting a Not Acceptable error.

Not Acceptable

An appropriate representation of the requested resource /wp-admin/options-permalink.php could not be found on this server.

Additionally, a 406 Not Acceptable error was encountered while trying to use an ErrorDocument to handle the request.

Came back to my article and with so many frustration and tries, I was able to write and publish it … but my entire website was a fiasco with broken links and no traffic from search engines.

Second fix from the internet was changing .htaccess… Actually something related to mod_security. I start digging for documentation and try with .htaccess fix but no results. This step was not solving my problem but brought me closer to it.

If you host permit, adding the following lines to your .htaccess file will disable your mod_security and fix your problem:

<IfModule mod_security.c>
SecFilterEngine Off
SecFilterScanPOST Off
</IfModule>

In my case this was not working … but I had the inspiration to check in my CPANEL for Mod Security settings. And I was lucky. 1. In CPANEL in the security section you can find ModSecurity:

2. Disable it for your website (be aware of the risks and do it permanently or just when is needed then turn it back on):

3. Do your magic on your blog. Changing back your permalink custom settings will work fine, as well as posting and uploading files.

Take your time and read a little bit about Mod Security. And have fun!

The disk is full trying to write to Macintosh HD.

The disk is full trying to write to Macintosh HD. Free some space on this drive, or save the document on another disk.

Try one or more of the following:
*Close any unneeded documents, programs, and windows.
*Save the current document on another disk.

If you run into this error you might need to check this error first:
Word is unable to save the AutoRecover file in the location you have specified.

Word is unable to save the AutoRecover file in the location you have specified.

Word is unable to save the AutoRecover file in the location you have specified.  Make sure that you have specified a valid location for AutoRecover files in Preferences, and that you have permission to write files to the location you specified.

If you get into this error massage check if there is any location set for the autorecovery files (I had it empty), and change it or set one:

  1. Go to: Word > Preferences (or press ⌘,) > Personal Settings > File Locations.
  2. Either double click on “Autorecover files” or single click and then click on “Modify”.
  3. Pick a folder and then hit “Open” I have it in Documents > Microsoft > Office 2011 Autorecovery.

Avoid folders where Word app can get into trouble with file permission (changing or saving). Also, if you use Desktop or other folder that is synchronized with iCloud, be aware that large documents need more time to upload. A small internet connection might block word access for quite a long time and this message can become quite frustrated.

How to rotate a batch of images/photos

I just scanned a multiple page document and I just saw that all my pages are upside down. For one image is easy to rotate … just open it and use the rotation arrows to do it. But when you deal with 60 of them, you might want to do it all at once.

And that’s pretty easy to be done.

  1. Select all files …. CTRL+A … click and drag for selection … CTRL+click … SHIFT and arrow keys.
  2. Right Click and select Rotate clockwise or Anticlockwise

Have fun!