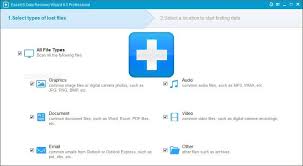
Last week I tested a data recovery tool called EaseUS Data Recovery Wizard. I was surprised to see that all my files are not deleted even if I empty Trash and format the drive. All data was still there and that tool made an extremely good job recovering my files.
Therefore I just go searching for explanations. There was a simple solution. The modern digital storage devices use multiple levels of data protection in order to prevent accidental data loss. Data is protected both hardware and software and modern devices are quite reliable now. For example, removing your USB memory during reading or writing data will most probable keep your data save even if this action is strongly not recommended (you should always remove your drive safely). Software protection works quite simple, it just not delete files, only overwrites them. If you delete a file and empty the Trash, that file will just be set as “free” and nothing else. The memory used by that file is not changed until another file will be written.
If you need to sell any storage device (usb drive, hard disk, ssd, your mac, pc, phone, SD card and so on) you need to be aware that the buyer might be able to restore some of your personal data. Your iPhone and Mac store your data encrypted by default and you should be safe, but other drives you might use are usually not protected. For example, I used a USB hard disk (500GB) to store my files. A couple of days ago I got another external drive and I moved all my data from it. Empty my trash and was curious of what I can recover from it… and surprise surprise, all my data was there.

If you want to permanently delete your data from a drive you need to:
1. Open Disk Utility
 3. Select your drive and click Erase

4. Go to Security Options… for extra settings. You can choose between faster or more secure and 2 steps between:


Fastest: This option does not securely erase the files on the disk. A disk recovery application may be able to recover the files.

Fast: This option writes a pass of random data and then a single pass of zeros over the entire disk. It erases the information used to access your files and writes over the data 2 times.

Secure: This option is a DOE-compliant 3-pass secure erase. It writes two passes of random data followed by a single pass of known data over the entire disk. It erases the information used to access your files and writes over the data 3 times.

Most secure: This option meets the US Department of Defense (DoD) 5220-22 M standard for securely erasing magnetic media. It erases the information used to access your files and writes over the data 7 times.
5. I chose most secure option and clicked OK.

almost one day later:

The log:
Starting secure erase…

                      Pass: 1

                      Pass: 2

                      Pass: 3

                      Pass: 4

                      Pass: 5

                      Pass: 6

                      Pass: 7

                      Unmounting disk

                      Erasing

                      Volume name : Data

                      Partition offset : 411648 sectors (210763776 bytes)

                      Volume size : 976361472 sectors (499897073664 bytes)

                      Bytes per sector : 512

                      Bytes per cluster: 131072

                      FAT offset : 2048 sectors (1048576 bytes)

                      # FAT sectors : 30720

                      Number of FATs : 1

                      Cluster offset : 32768 sectors (16777216 bytes)

                      # Clusters : 3813784

                      Volume Serial # : 59a6aade

                      Bitmap start : 2

                      Bitmap file size : 476723

                      Upcase start : 6

                      Upcase file size : 5836

                      Root start : 7
Mounting disk

                      Operation successful.
The drive was unmounted and mounted again. And this should be all. I checked again with EaseUS Data Recovery Wizard and it was not able to recover any of my files (deep scan included):